Wednesday, October 20, 2010

Black Bean and Pumpkin Chili

Last night I had some of the best homemade soup I've ever tasted. What surprised me was that it had so many things I usually hate in food (ironically, I'm one of the pickiest eaters you'll ever meet): chili powder, tomatoes, onions, and pumpkin. Don't get me wrong, all those ingredients are perfectly fine for adding flavor or visual excitement, I just don't like to eat them. Anyway, all of my preconceived notions flew immediately out the window when I tried this soup my friend (not sister) Megan made. It was delicious! I even went back for seconds (and wouldn't have been opposed to thirds...).

I asked Megan to send me the recipe (sorry, no pictures), as well as the changes she made, so here it is for your enjoyment. This is a perfect fall soup/chili, so get on it!

Megan says: "So I actually used a green pepper because the yellow peppers at the store were gross. Also I only used a small can of chicken broth (cause that's all I had) and then added about a half a can of water. I also added more salt at the very end to add more flavor."

Black Bean & Pumpkin Chili
From Taste of Home
Serves: 10 (yields about 2.5 quarts)

1 medium onion, minced
1 medium sweet yellow pepper, chopped
3 garlic cloves, minced
2 tablespoons olive oil
3 cups chicken or vegetable broth
2 cans (15 oz each) black beans, rinsed & drained
1 can (15 oz) solid pack pumpkin (make sure it's not the pumpkin pie kind, just the pumpkin puree) Megan also says she isn't sure that hers wasn't pie filling, but at least it wasn't spiced.
1 can (14.5 oz) diced tomatoes, undrained
2 teaspoons dried parsley flakes
2 teaspoons chili powder
1 1/2 teaspoons dried oregano
1/2 teaspoon salt

In a large skillet, saute the onion, yellow pepper & garlic in olive oil for about 2 mins. Add the ground turkey and cook until brown. Transfer to a 5qt slow cooker/crock pot; stir in the remaining ingredients. Cover and cook on low for 4-5 hours or until heated through.

Sunday, October 10, 2010

Madeleines

A couple of months ago I found a madeleine pan at DI (huge thrift store) for $2. Ever since then, I've been wanting to make the yummy-looking scalloped French cakes. Are they cakes? I think they are.
Madeleines
Anyway, this morning I finally got around to it. I gave them to a friend of mine who needed them, but not before my roommate and I tried one (that's the good thing about making not cakes for people-- you can have some and they will never know). They were very lemony, soft, airy, moist, and otherwise delicious. There are a couple of kinds of food I usually have trouble with, and one of them is French pastry. So if this counts as pastry...I'm finally getting the hang of it!

The key flavors in madeleines are butter and lemon, but the key ingredient is egg. The eggs have to be whipped into lighter-than-air goop, otherwise you won't get the airiness. The recipe calls for 4 minutes of high-powered whisking, but since I'm still using my muscles to mix things, it was a little harder to do, and I was worried that they wouldn't be fluffy enough. But I think all this manual labor is paying off, because I got the egg pretty frothy (and my upper arms have been a little sore lately from it all...yay?).
Adding butter to the froth
As for the butter, I'd completely forgotten to restock when I was last at the store, so I used tub butter (or margarine, whatever), and microwaved it (there's a recommended process for the butter in this recipe to melt it on the stove for a while, allowing it to become golden and "nutty," then straining it) and it still turned out okay! I also didn't think there was enough lemon in the zest, so I also squeezed in a bit of the juice (plus I'm focusing on not wasting, so win/win) into the batter, which made it better. Yep.
Zested lemon
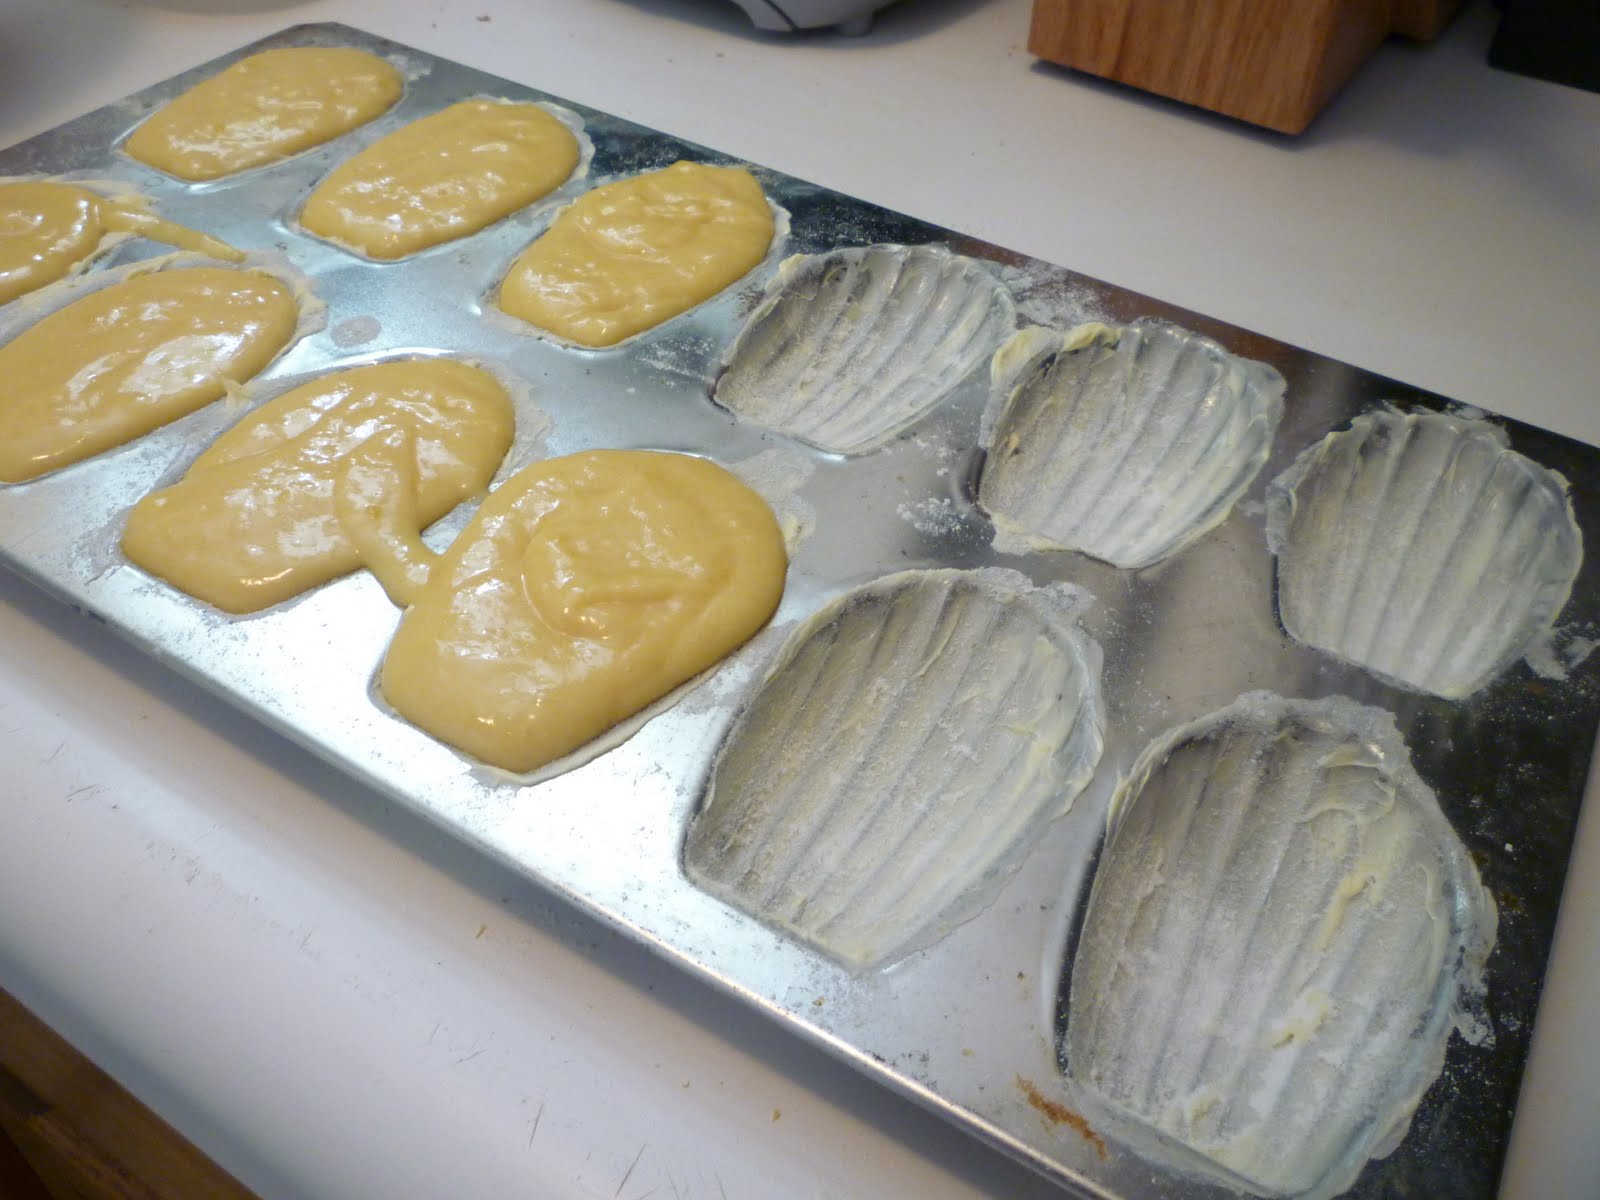
Also, the batter only made enough for barely 11 madeleines instead of 12, but I found out after they cooked that it's because I probably put way too much in each form/mold/whatever.
Filling the pan molds
Anyway, now for the recipe. I don't remember where I got it, and usually I'm really good about writing it down, but a good guess would be Smitten Kitchen, or maybe Tartelette. Check 'em both out.

Classic Madeleines [Madeleines Classiques]
adapted from Patisserie Lerch, via Paris Sweets

3/4 cup (105 grams) all-purpose flour
1/2 teaspoon double-acting baking soda
2 large eggs, at room temperature
1/2 cup (100 grams) sugar
Grated zest of 1 lemon to zest a lemon, you basically use the skinny bumpy part of your cheese grater to scrape off the rind. The grated rind is the part you use. Check out the picture if you don't know what I'm talking about.
2 teaspoons pure vanilla extract
5 tablespoons (2 1/2 ounces; 70 grams) unsalted butter, melted and cooled

1. Sift together the flour and baking powder and keep close at hand. Working in a mixer fit with the whisk attachment, beat the eggs and sugar together on medium-high speed until they thicken and lighten in color, 2 to 4 minutes. Beat in the lemon zest and vanilla. Switch to a large rubber spatula and gently fold in the dry ingredients, followed by the melted butter. Cover the batter with plastic wrap, pressing the wrap against the surface to create an airtight seal, and chill for at least 3 hours, perhaps longer–chilling helps the batter develop its characteristic crown, known as the hump or the bump. (The batter can be kept tightly covered in the refrigerator for up to 2 days.)

2. Center a rack in the oven and preheat the oven to 400 degrees F (200 degrees C). If your Madeleine pan is not nonstick, generously butter it, dust the insides with flour and tap out the excess. If the pan is nonstick, you still might want to give it an insurance coating of butter and flour. If it is silicone, do nothing. No matter what kind of pan you have, place it on a baking sheet for easy transportability.

3. Divide the batter among the molds, filling them almost to the top. Don’t worry about smoothing the batter, it will even out as it bakes.

4. Bake large madeleines for 11 to 13 minutes, small ones for 8 to 10 minutes, or until the cookies are puffed and golden and spring back when touched. Pull the pan from the oven and remove the cookies by either rapping the pan against the counter (the madeleines should drop out) or gently running a butte knife around the edges of the cookies. Allow the madeleines to cool on a cooling rack. They can be served ever so slightly warm or at room temperature.

Let Them Eat Cake

As promised, here are some tips on making your cake as near to perfect as I've been able to get it from dear old me:

1. Line your pan with wax paper or parchment paper. Grease both below and above the paper. This will make it so your cake comes out nice and clean and never sticks. And you just peel off the paper, it's so easy. This is especially important for softer or fluffier cakes.

2. Let the layers cool completely. By this I mean you should probably put them in the freezer, but only if it's a soft cake! If you have a really hard cake (why would you?) don't do this. But generally I like to freeze my cake for about twenty minutes prior to frosting. It just makes it alot easier to work with. You can leave it in the pan or not.

3. Level the layer(s) before frosting. It makes your cake a lot easier to frost because you don't have gaps where the flat part of the top layer meets the dome of the bottom layer. Plus your top layer won't crack because it's uneven. Get a long, serrated knife and level off the top of the bottom layer so that it's flat enough. It doesn't have to be perfectly flat.

4. Shape the cake. Obviously you only do this if you're making a special shape (heart, star, monkey, whatever) or if you're like me and you burn the outer edges of the layers. Use a long, thinnish knife for best maneuverability, especially if you're making a circle.

5. Before frosting, line the outer edge of your plate/platter/whatever with strips of wax paper or parchment paper. Try to layer them so that they overlap a little on the edge. When you're done frosting the whole cake, pull them out at an angle so that frosting goes with it. Now your plate is spotless! (This took some practice for me, and I still mess up sometimes.)

6. Don't use a butter knife to frost. I've found that the best thing to frost with is a rubber spatula, preferably one of the smaller kinds. If you don't have one of those, then any other wide, flattish tool will do just fine. It's a lot easier to frost large areas, and I find that fewer crumbs end up in the frosting. Plus the finish is a lot smoother. Perfect!

7. If your cake is really soft, do a crumb layer of frosting first. I find that this isn't always necessary, but it does help if your cake is crumbly, or if you just want to be a perfectionist, or whatever. Put a thinnish layer of frosting on your cake (it should have crumbs in it, if not, you don't need to do this) and let it refrigerate for a few minutes. Then take it back out and finish frosting, and no more crumbs will get mixed in. Ta da!
P.S. I have no idea why my pictures have been so grainy/pixelated lately. It's quite bizarre.

Wednesday, October 6, 2010

Dark Chocolate Cake

Last week was my friend/neighbor/home teacher Eric's birthday. So to thank him for being all of those things (yes, even the neighbor thing, because I really do have to borrow cups of milk sometimes, and neighbors are so obliging), and to wish him a happy birthday, I decided to bake him a cake.

I have several cakes on my list of recipes to try, and this one was next. It's a dark chocolate cake recipe I pulled from Martha Stewart's website. After this experiment, I don't think I trust Martha Stewart anymore (there, I said it. Now all the Food People can lynch me). Why? Well, a lot of reasons. Maybe she just doesn't have a dinky basement kitchen with a terrible excuse for an oven at a relatively high altitude. Because I really don't think my exchanging part of the semi-sweet chocolate required for the 100% stuff I found at the farmer's market really should have made that much of a difference, and I don't know what else it could be!
Black label: The Good Stuff.
The batter turned out to be more like dough, even after adding a little extra buttermilk, and beating the mixture as hard as I could (who needs an electric mixer? I'm getting buff!).
Cake Dough?
Anyway, the edges and bottom of each cake layer burned (I made it a three layer cake instead of a two layer one, and no, I don't think that created a problem because the dough was still very stiff). I was quite sad. But I was able to try out a bunch of things that will make your cake look pretty (I think I will do a separate post on those tips, so look for that in the future), and they worked pretty well. I did end up wasting the edges of the cake by cutting them off, though, even though they were burned. I just wish that hadn't happened, especially after I spent the money on the chocolate (hoo boy).

I'm also trying to find uses for leftover ingredients, so I don't have to waste as much. I have a whole half carton of buttermilk left (pancakes? waffles? biscuits?) and a ton of frosting (cupcakes? cake?), so that should be fun for me :)

If you're curious about how the cake ended up tasting, Eric and my other friend Kevin (the two who tried the cake while I was around) say that it is delicious-- way better than boxed mix cake, and you'll need a gallon of milk to get through a small slice. I sort of wish I'd been able to try some, but I think it's weird to ask for part of what you just gave someone. And it was such a tiny cake in the end... But hey! At least I got all that extra frosting, right?
Decorated with almond slivers to make it pretty, and distract you from the fact that it is half the size it's supposed to be.

Dark Chocolate Cake
from Martha Stewart

1 cup (2 sticks) unsalted butter, room temperature, plus more for pans
1/2 cup unsweetened Dutch-process cocoa (spooned and leveled), plus more for pans -I'm in the market for free Dutch Process cocoa, just fyi!!! But if you don't have generous donors, go ahead and use regular cocoa, that's what I did
2 cups all-purpose flour (spooned and leveled)
1/2 teaspoon baking powder
1/2 teaspoon baking soda
1/2 teaspoon salt
1 1/2 cups packed light-brown sugar
2 large eggs plus 2 large egg yolks, room temperature
6 ounces bittersweet chocolate, melted -Or mix in some darker stuff if you can find it, and if you feel up to the richness!
1 teaspoon pure vanilla extract
1 cup low-fat buttermilk
Dark Chocolate Ganache (recipe below)

Preheat oven to 350. Butter two (or three if you're like me and you wanted a second chance after the other cake) 8-inch round cake pans; dust with cocoa, tapping out excess. Line bottom of each pan with a round of parchment paper; set aside. In a medium bowl, whisk together flour, cocoa, baking powder, baking soda, and salt; set aside.

In a large bowl, using an electric mixer (or your Governator arm strength), beat butter and sugar until light and fluffy. Add eggs and yolks, one at a time, beating well after each addition; beat in chocolate and vanilla. With mixer on low, alternately add flour mixture in three parts and buttermilk in two, beginning and ending with flour mixture. -Like I mentioned earlier, I had to add extra buttermilk and my "batter" still turned out like soft bread dough...weird)

Divide batter between prepared pans; smooth tops. Bake until a toothpick inserted in center of a cake comes out clean, 40 to 45 minutes -Mine only had to cook for about 30 mins, and like I said, they burned! So keep a close eye on them, especially if your batter ends up like mine did. Cool in pans 15 minutes; run a knife around edge of each pan, and invert cakes onto a wire rack to cool completely. -I usually refrigerate/freeze my cakes pre-frosting for about ten to fifteen minutes so they're nice and firm for the frosting process, but that was probably a bad idea in this case, because the edges got nice and hard-- as in too hard to allow for a cake I was giving to someone else.

Set a rimmed baking sheet upside down on a work surface -Yes, thank you Martha, that seems excessive. But go ahead if you want to. Place one cake on sheet, and spread top with 1/3 of ganache. Place second cake on top, and spread remaining ganache over top and sides of cake. Using two wide metal spatulas, carefully transfer frosted cake to a serving platter.

Dark Chocolate Ganache

2 cups heavy cream
1/2 cup confectioners' sugar
1/8 teaspoon salt
1 pound bittersweet chocolate, roughly chopped

In a large saucepan, bring 2 cups heavy cream, 1/2 cup confectioners' sugar, and 1/8 teaspoon salt to a boil. Remove from heat; add 1 pound bittersweet chocolate, roughly chopped, and let stand, without stirring, for 1 minute. Whisk just until combined. Refrigerate, stirring occasionally, until spreadable, about 1 hour. -You can pop it in the freezer to speed up the process, but make sure you keep a VERY CLOSE eye on it so it doesn't get too hard, especially around the edges. This WILL happen. Trust me. If you neglected it (hum...like me...) and it gets a bit too hard, let it sit out for a while, or maybe put it in a warm area until it softens. But don't let it soften too much, or you've begun a vicious cycle.

P.S. Please pardon the grainy pictures. Even with my super-fancy $100 Cosco camera that serves me so well, I live in a basement with no light, and it was after dark anyway. So there.

Monday, October 4, 2010

Pumpkin Chocolate Chip Cookies

Last night we were all hanging out at my sister Megan's, and she made these de-licious pumpkin chocolate chip cookies (way better than store bought, although maybe not as big) in honor of fall. And since I haven't actually convinced anyone to actually be a guest blogger, here is simply the recipe.

Pumpkin Cookies
from Megan, who got it from her old friend Candice

1 cup shortening
1 cup sugar
1 cup pumpkin (plain canned or smooth pumpkin, NOT pumpkin pie mix!)
1 egg
1 tsp vanilla

1 tsp cinnamon
1 tsp salt
1 tsp baking powder
2 cups flour

optional: chocolate chips

Cream shortening, sugar, vanilla and eggs. Add pumpkin. Mix dry ingredients and add to pumpkin mixture. If desired, add chocolate chips.
Pumpkin and chocolate
Drop onto cookie sheet with spoon or size 40 ice cream scoop.
Sweet-smelling dough balls
Bake at 350 F for 10 to 15 minutes. This recipe works fine at high altitudes.
Golden.