Wednesday, December 19, 2012

Pomodoro Romano Sauce

When we were in Italy, one of the foods that I discovered I really loved was a jarred pomodoro romano sauce.  I've never seen it sold here in the States, and anyway, everything's better fresh, so I vowed to recreate it when we returned home.  I decided to alter a pomodoro sauce recipe I already had, and we invited our friends Autumn and Joe over to test out the finished product.

I also had a serious time trying to find fresh pasta.  Everywhere I go I can find fresh raviolis and tortellinis galore, but never any noodles.  Eventually I found it at our local(ish) farmers-type market grocery store, Sprouts.  I wish Utah Valley was more into eating fresh and good quality food.

According to Joe, who served a mission in Italy, it's totally uncouth to
put grapes on your plate, but I don't care.
Pomodoro Romano Sauce
modified from a recipe I think I got from Take Home Chef about 6 years ago

2 T olive oil
1 medium onion, chopped/diced
3 cloves garlic, chopped/diced
2 cans (they're large, I forget the size) whole, peeled tomatoes, drained and crushed by hand, juices reserved
1 tsp salt
1/4 tsp pepper
1 cup fresh grated/shredded Romano cheese (I could only find a three-cheese blend that was primarily Romano)
1/4 cup fresh basil leaves, torn into pieces

1. Heat oil in a large saucepan over medium-low heat.

2. Add onion and garlic and cook until vegetables are soft, about 5 minutes.

3. Carefully add tomatoes and about 3/4 cup of the reserved juices.  Season with salt and pepper.  I also added about a half a tablespoon of white sugar and a half a tablespoon of brown sugar to offset the tomato's bitterness, but that is optional.

Sauceh
4. Cook until sauce is thick, about 15 minutes.

5. Simmer for 20-30 more minutes.  Periodically stir with a wooden spoon (because everything tastes better when it's stirred with a wooden spoon), breaking up and squishing tomatoes and adding reserved juices as needed, until it's all in.

6. About ten minutes to the end, stir in the cheese, adding it slowly in small amounts until it's all stirred in.  Break up any clumps of cheese.

Cheesey deliciousness.
7. Add the shredded basil and stir in.

Mr Yumness
8. Serve immediately over fresh pasta.


A good time was had by all.  The boys even humored me for forced candid pictures, heh heh.


Oh, and we had pie for dessert.  Delicious pie.

Snickerdoodles

These are some of my favorite non-chocolate cookies (nothing beats chocolate...usually).  And Sam confessed to me the other day that these were actually his favorite cookies that I make of all the other kinds.  Taken aback!

Snicker.
I remember loving these as a child, but we didn't often make them.  Maybe because they require a secret ingredient that isn't super common, or really used for anything besides snickerdoodles.

Tartar: huah!  What is it good for? 
Anyway, they're sort of holiday-y in my mind, so here's a nice holiday treat!

Snickerdoodles
lightly modified from ye olde childhood recipe from Mom's recipe box

1 cup butter
1 1/2 cup sugar
2 eggs
2 3/4 cup flour
1 tsp baking soda
2 tsp cream of tartar
1/4 tsp salt

1. Cream the butter and sugar together.  In case you're wondering, the original recipe calls for half butter and half shortening, but butter is always better in my opinion.  Plus shortening is gross and I don't have any.  Your butter should be softish.  If it's frozen or too cold, let it sit out for a while, but do not melt it!  It will mix better and help the cookies be fluffier.

Cream it up, one two three
2. In a separate bowl, combine the flour, baking soda, cream of tartar, and salt.  Sift or whisk together.

3. Combine sugar mix and flour together.  You may need to work the dough with your hands if your butter was especially cold.

4. Round dough into little balls.  Roll in 2 Tbs of sugar and 2 tsp of cinnamon combined in a little bowl.

Give it a nice coating
5. Place balls an inch-ish apart on greased (or parchment-papered) cookie sheets.  Cook at 400 degrees for about 10 minutes.

Dainties!
6.  Let cool, then eat warm.  Maybe with hot chocolate.  Oh yum.

An encore

Monday, December 3, 2012

Eggnog Biscuits

Yesterday afternoon we got back from our two-week trip to Italy!  It was a crazy and fun time, and we had a lot of delicious food that I'll be talking about in future posts.  But today, I have for you these festive biscuits!

Because we got in on a Sunday afternoon, and because our car decided to die while we were gone and left us with no way to get to the store, we had no food this morning for breakfast.  Lying awake in the middle of the night thanks to jet lag had me wondering what in the world we would eat, and my mind ran to my favorite I-forgot-to-go-shopping breakfast: biscuits!

Usually I have some Bisquik on hand for such emergencies, but we only have about half a cup left, and I'm trying to phase it out because I don't use it that often and it has all those preservatives that make me skeptical.

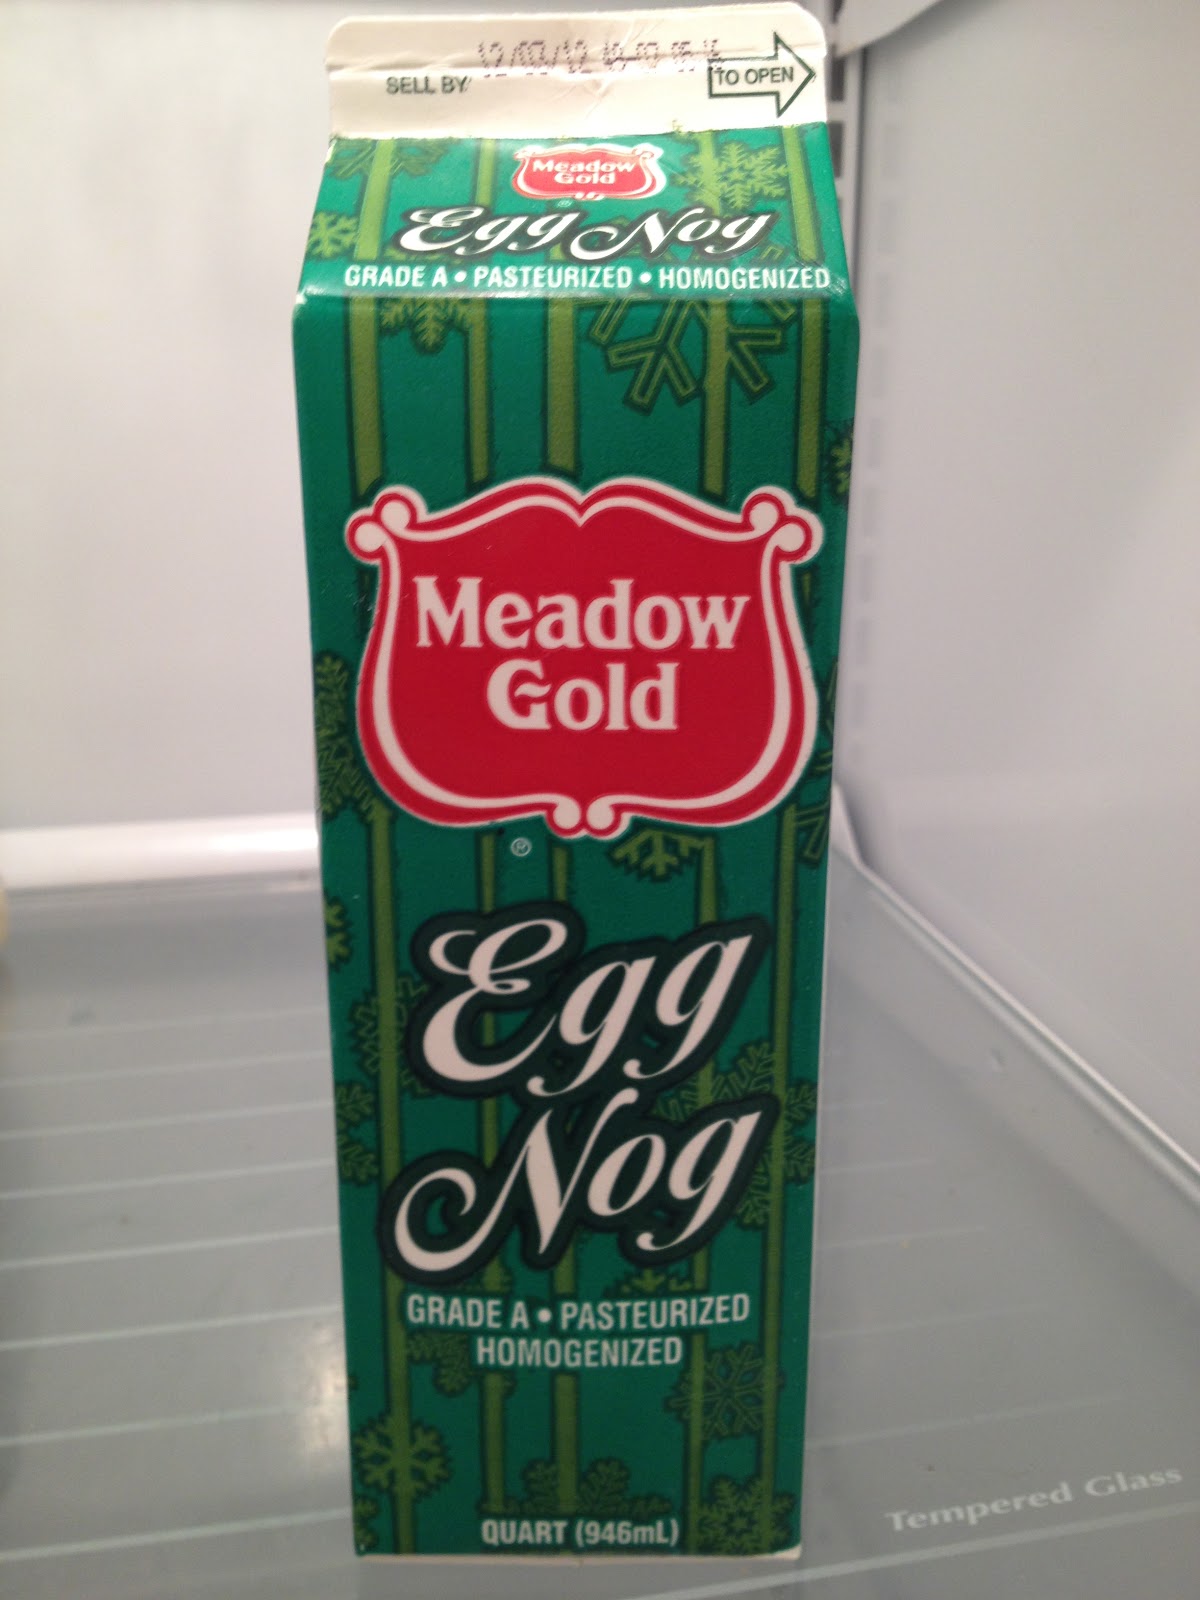
A biscuit-from-scratch recipe is pretty easy.  But without milk, it'd be useless (well, there's water, but I prefer not to eat things with the excitement of hard tack).  Fortunately, my brother in law persuaded us to take a leftover container of eggnog with us after we had dinner with them last night.

I hate eggnog.  Sam loves it.  Since the eggnog expires today, I was afraid I'd be nursing a Sam sick from an eggnog binge by the end of the day.

This is literally the only thing in our fridge.
THE ULTIMATE SOLUTION TO ALL PROBLEMS IN MY LIFE (I wish): make eggnog biscuits!

So that's just what I did, simultaneously (but temporarily) curbing my appetite for holiday goodness.
oh, oh, the mistletoe...
Homemade Eggnog Biscuits
de moi - makes about 9 large biscuits, more smaller ones

2 cups flour

1 T baking powder

1 T granulated sugar

1 t salt

1/3 cup shortening, margarine, or butter (I used butter)

1 cup eggnog

cinnamon and/or nutmeg to taste

1. Preheat oven to 425 degrees.

2. Sift together dry ingredients.

3. Cut butter into little chunks.  Work into flour mix with your hands (you can also use a pastry cutter if you're timid, but hands always work better).  The end result will be a sort of moldable, mealy flour.

4. Add eggnog and stir together (or keep using your hands) until just combined.  Dough should be sticky enough to pull away from the bowl.  If it's too wet, add a little flour.  If it's too dry, add a little more eggnog.

5.  If you're making drop biscuits (I always prefer drop biscuits, they have better texture in my opinion), just skip the next step and go straight to step 7.

6.  For round biscuits, knead the dough on a floured surface until it's less sticky.  Roll out to ~1/4" thickness.  Using a round cookie cutter or glass top, cut out biscuits.

7.  Place biscuits on greased (or parchment-papered) cookie sheet.  Bake for 13-15 minutes (mine went for just over 13 minutes and were only ever-so-slightly doughy in the center.  But I liked it.

8.  Eat while still warm.  We tried butter, jam, and honey, and decided the honey was the best topper.  But they are also very tasty plain.

Flavor note:  if you want a more subtle and less "spiced" taste, omit the cinnamon/nutmeg.  They're still very tasty.

look at that fluffy, crisp goodness

Now I'm off to plan some Christmas sugar cookies...

Tuesday, October 23, 2012

Brownie Double Chocolate Cookies

Sometimes (ie the past few months) I'm really lazy about the way I cook.  Like yesterday.  I was really craving something chocolately and delicious, and I haven't made any desserts in a long time.  However, the idea of going whole-hog into an elaborate and time-consuming cookie recipe did not sound so appealing.

I remembered that we had a few packages of Ghiradelli double dark chocolate brownie mix left in a cupboard somewhere (actually, I knew exactly which cupboard they were in...how could I forget?).  But I already had my heart set on cookies.  And so!  These were born:
I just realized how crummy of a picture this is...I think I'll go clean my lens. And stage it better next time (but those cookies I pulled out were so tempting, I had to eat some...)
Brownie Double Chocolate Cookies
from Food.com

1 regular package brownie mix

1/2 cup all-purpose flour

6 tablespoons canola oil

2 eggs, beaten

2 tablespoons water

6 ounces semi-sweet chocolate chips

1. Mix everything together.  The dough will be relatively stiff and very sticky.

2. Drop in small spoonfulls onto cookie sheet.  Warning: the dough is very sticky!  You will need to spray your cookie sheet.  I used parchment paper and I had difficulty getting them off.  I had to peel the paper off and even then a couple cookie bottoms didn't make it.

3. Cook in oven preheated to 350 degrees and cook for 9-11 minutes (mine went for maybe a little over 11 minutes but we have a stupid oven.  Test doneness by poking them gently with your finger.  The cookie will give but nothing should stick to you.  They will be puffy.

4. Let cool about 5-10 minutes on the sheet, then transfer to cooling rack.  The cookies will sort of deflate.  They are still delicious, and quite chewy.  They taste like brownies.  Go figure.

Makes 2-3 dozen cookies (that's my estimate...I didn't count)

Monday, October 22, 2012

Fruity Oat Muffins

While I was working in Tooele the past couple of weeks, I had no time for breakfast before I left the house.  Therefore, each Sunday I would make these muffins to take for breakfast in the car throughout the week.  I tried two varieties, banana and peach.  The peach flavor sort of dissolved in the baking, so I think I would add probably an extra cup of peaches if I were to make them again.  I considered making pomegranate with the frozen jewels (that's what they're called, right?) we have, and I'm sure any kind of fruit will do just fine in this kind of muffin.

The base recipe was essentially the banana bread muffin recipe I've posted before, only with alterations in the flour (I take it no one ever made those muffins when I posted it before because the flour is GREATLY under-measured.  Sorry about that.)  Also, sorry I don't have any pictures.  I never really had the time or thought to do it.  But please please please trust me they are really good.  Anyway, here we go:

Fruit Oat Muffins
based on Reyna's banana bread, altered to meet my needs
makes about 15-18 muffins


1/2 stick butter (notice this means 1/4 cup of butter)

1 1/3 c. sugar (I've been meaning to try it with less, perhaps 1 cup?)

2 eggs

1 1/4 tsp. vanilla

1+ cup of flour

1 tsp. baking powder

1 tsp. baking soda

3/4 c. sour cream

3 mashed ripe bananas or 2-3 cups diced peaches, or any amount of any fruit you want to try

cinnamon and nutmeg to taste (I use a LOT, like maybe 2 T?)

1+ cup oats

1. Preheat oven to 350 and prepare muffin pans.

2. Then, beat butter until fluffy.  Gradually add sugar. Continue beating until light and fluffy.

3. Beat in eggs one at a time. Add vanilla.

4. Add sour cream to the sugar mixture.

5. Add bananas or whatever fruit you're using.

6. Sift flour, baking powder, soda, and salt together.  Add to mix until just blended.  Add cinnamon, nutmeg, and oats.  If the batter is not the right thickness, add a little more flour until it is (I don't know how to describe it...not very runny, sort of chunky?).

7. Turn into prepared pan. Bake at 350 degrees for about 30-35 minutes (depending on your oven) or until pick inserted into center of muffins comes out clean and they look and smell delicious.

Home-made Macaroni and Cheese

I like macaroni and cheese.  I used to have it maybe every couple of days before I got married (the alternate days were nearly always pizza...what was wrong with me).  I hardly ever eat it now, so we don't really buy it.  When I'm craving it, I am sad.  Until I finally sat down and did a little research on how to make it on my own!

When most people hear "home-made macaroni and cheese" they think of a breaded casserole that you eat with ketchup or something.  This is like legit macaroni and cheese in a pot like you'd get in a box.  Only better because it isn't made with powdered cheese curds or whatever, and you can make it from what you have on hand.

It took me a couple of tries to get this recipe to be really good.  The first time it was incredibly bitter and not very creamy.  Also, when I did this, I wasn't really measuring, I was just going by proportions, so hopefully you will still be able to follow.

In my research (during which I became quite familiarly acquainted with Paula Dean's personality during a side track) I learned that you must have an appropriate amount of cream in order for the cheese to bond and not clump.  Or somesuch.  That is why most mac and cheese recipes require cream.  However!  I don't keep cream on hand.  It also supposedly turns out better if you use two to four different types of cheeses.  But all we have is medium cheddar.  So there are a lot of other options for making this kind of macaroni and cheese if you go buy different ingredients (or maybe you regularly stock your fridge with cream and three types of cheese), but this recipe is mostly to make it with what you have on hand and make it taste delicious!  Now, read on, MacDuff!
Creamy deliciousness.
Home-made Macaroni and Cheese
from THE MIND OF ME
serves about 1-2 people

1 cup or however much pasta you are making (I like elbows chiffere, the ridges catch more sauce)

1/4-1/2 cup stick butter or margarine (depending on how buttery you want it...I like it buttery)

1/2 cup milk (keep more on hand in case you need it later)

1/2-1 cup cheese of choice (if you use a milder or white cheese, you might want to supplement with a little of something sharper)

fresh ground black pepper

sweet basil (dried/flaked/whatever...in your spice cupboard)

1. Boil and drain the pasta and return it to the pot on low-medium heat.

2. Add the butter and stir around until pasta is coated.

3. Add the milk.

4. Add the cheese.  Make sure the heat is up enough to melt the cheese relatively quickly (turn it up if you have to, I don't remember how hot I had it in the end).  Stir the cheese into pasta slowly, making sure it melts and doesn't clump.  If you need to, add a little more milk, or if you want, more cheese.

5. Grind in a bit of pepper.  Don't add too much!  The cheese will already be a little bitter and you don't want to overdo it.  Stir again, keeping an eye on the cheese and making sure it has melted properly.

6. Add a little basil, to taste.  The mildly sweet herb will help to offset a bit of the bitterness.

7. Taste test!  Add more of whatever you think it needs, or just eat it!  Say yum.

Tuesday, October 2, 2012

Nutella Cupcakes

I really love cupcakes.  Mucho.  And while the regular flavor kind with regular flavor frosting is my favorite, I love experimenting with different kinds, especially when it means I don't have to frost 3 dozen tiny cakes.  Which I've done.  And I wanted to shoot Betty Crocker.

And so, when I saw this recipe for "self-frosting" nutella cupcakes on Pinterest (it doesn't always have practical application, but this was one of those times when I trusted it), I decided to try them as a nice treat, because I think it's been like two weeks since I've made dessert, and that's a grave oversight.
NUTELLA.  It rules the universe in some places.
The only problem I had with these was that it was nearly IMPOSSIBLE to "swirl" the batter to make it look even remotely nice.  I tried using a chopstick first and when that was impossible, I quit and switched to a butter knife, which was even more difficult.  I don't think skipping the muffin papers would help either, because the dough would probably stick to the pan, even if it was sprayed.  So just be patient as you are swirling in the nutella and keep chanting to yourself "nutella, nutella, nutella..." or whatever it takes to keep the end goal in mind.  Because they are really delicious.

The only other thing is that the cupcakes get firm around the edges really fast, so you're probably going to have to eat them really quickly.  OH WELL.
Swirly twirly -ish

Nutella Cupcakes
by Babble.com at Shine via One Ordinary Day

1/4 cup butter, at room temperature
1/4 cup canola or mild vegetable oil
3/4 cup sugar
3 large eggs
1 tsp. vanilla
1 3/4 cup all purpose flour
2 tsp. baking powder
1/4 tsp. salt
1/4-1/2 cup Nutella, at room temperature

Preheat the oven to 325F.  In a medium bowl, beat the butter, oil and sugar with an electric mixer until light and fluffy.  Add the eggs and vanilla and beat until smooth.

In a small bowl, stir together the flour, baking powder and salt; add to the butter mixture and beat on low speed just until combined.  Divide the batter between 12 paper-lined muffin cups.  Drop a spoonful of Nutella on top of each, and swirl through the batter with the tip of a bamboo skewer or knife (or chopstick.  Or claws of death-- patience, young padawan!).
Swirl away, my son
Bake for 25-30 minutes, or until springy to the touch.  Cool on a wire rack.

Makes 12 cupcakes.